Surviving Delta Force: My Hard-Earned Lessons in Armor and Ammo
Master Delta Force's intricate damage system and armor mechanics to survive chaotic firefights and extract with valuable loot. Understand how weapon damage, ammo types, and armor levels critically impact your Operator's 100 HP pool.
I still remember my first chaotic firefight in Delta Force’s Operations mode. Bullets whizzed past my head, my heart pounded like a drum solo, and my Operator crumpled far too quickly. Back in the debrief, staring at the stats screen, I realized my mistake: I’d treated armor and ammo like any other shooter. Big mistake. Delta Force demands respect for its intricate damage systems – less opaque than Tarkov’s labyrinth, but far deeper than your average battle royale. Understanding how bullets meet plates isn’t just tactical; it’s the difference between extracting with loot and becoming someone else’s loot. Let me share the brutal, bullet-riddled wisdom I’ve gathered.
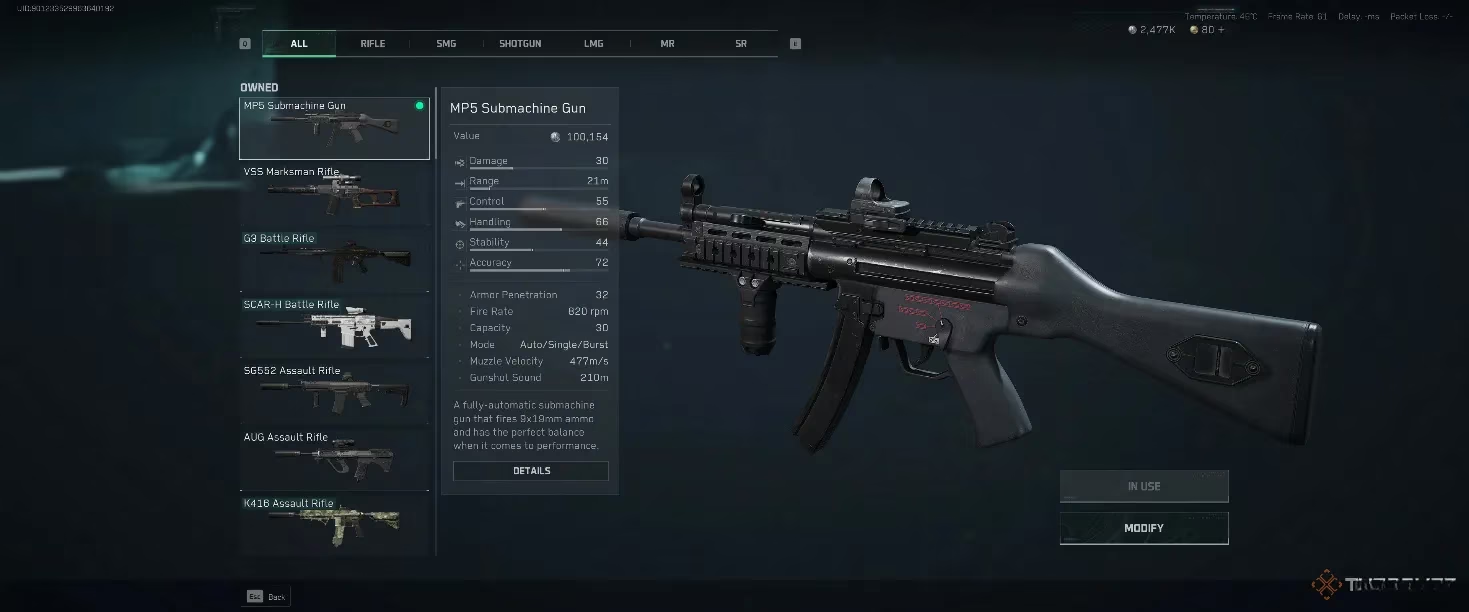
The Raw Truth of Weapon Damage: It all starts with the base damage etched into your weapon’s profile. My trusty MP5? It hits differently than a battle rifle, obviously. But here’s the kicker: every Operator has exactly 100 hit points, a single pool shared across all limbs. Landing a shot isn't enough; where you land it is critical. A headshot isn't just satisfying; it’s devastatingly efficient. Distance is your silent partner or your worst enemy. Up close, every gun delivers its maximum punch, but step back, and effectiveness plummets. That SMG I love for clearing buildings? Useless pinging off targets across a valley. And then there’s armor damage – a hidden stat on your gun dictating how much punishment it inflicts on protective plates with each hit. The ammo you load? That modifies this further, layering complexity onto every trigger pull.
Armor: Your Lifesaver (Until It Shatters): Armor isn't just cosmetic padding; it’s your lifeline, graded from Level 1 (flimsy) to Level 6 (near-impenetrable fortress). The moment a bullet screams towards you, the game performs a cold calculation: Armor Level vs. Ammo Level. The outcome dictates your survival:
-
Level Match: ⚔️ My armor groans, absorbing some damage but letting flesh damage bleed through. Durability drops based on the ammo and weapon power.
-
My Armor is Stronger: 🛡️ Pure relief! The plate stops the round cold. Only the armor takes a beating. My health stays pristine... until the armor breaks.
-
Their Ammo is Stronger: 😱 Pure terror. That high-pen round laughs at my protection, ignoring it completely and tearing straight into my precious 100 HP.
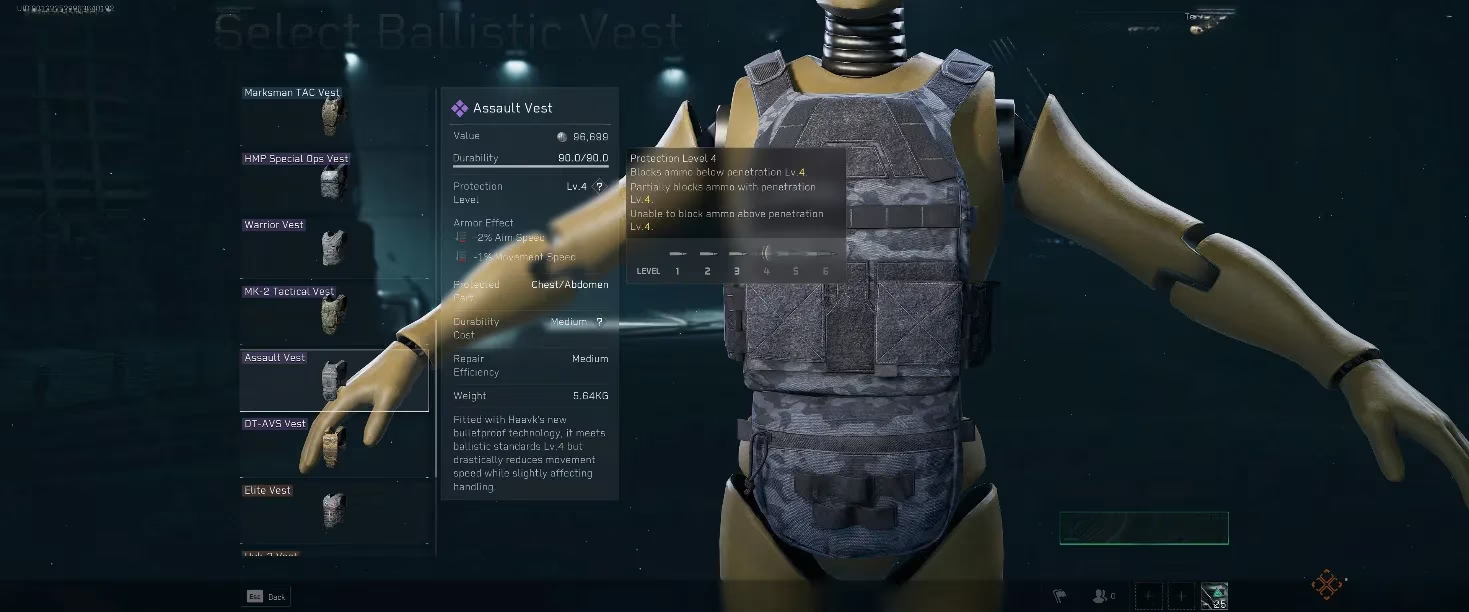
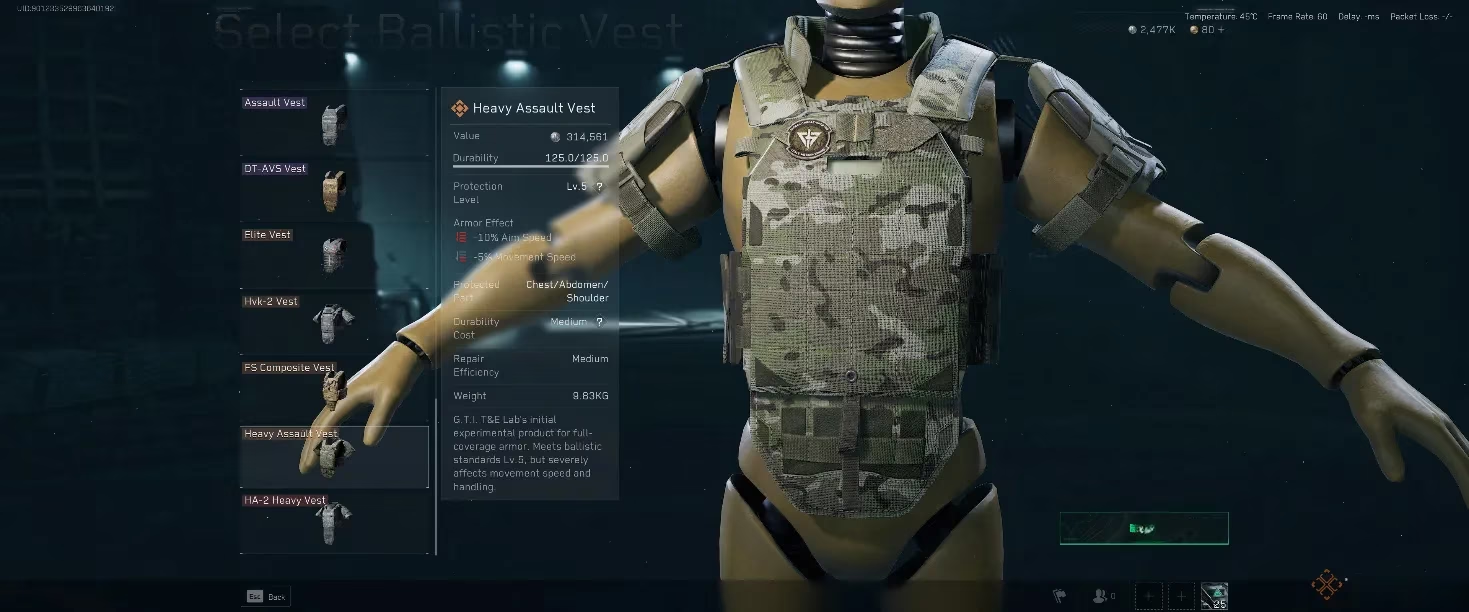
Coverage is non-negotiable. Armor only protects what it physically covers. I learned this the hard way when a well-placed shot to my exposed thigh ended a promising run. Chest plates are essential, abdomen coverage is wise, and shoulder pads? They offer protection but come with a heavy cost: weight cripples movement and aiming speed. Sometimes, agility is the best armor. I often sacrifice shoulder pads for the freedom to dodge and weave.
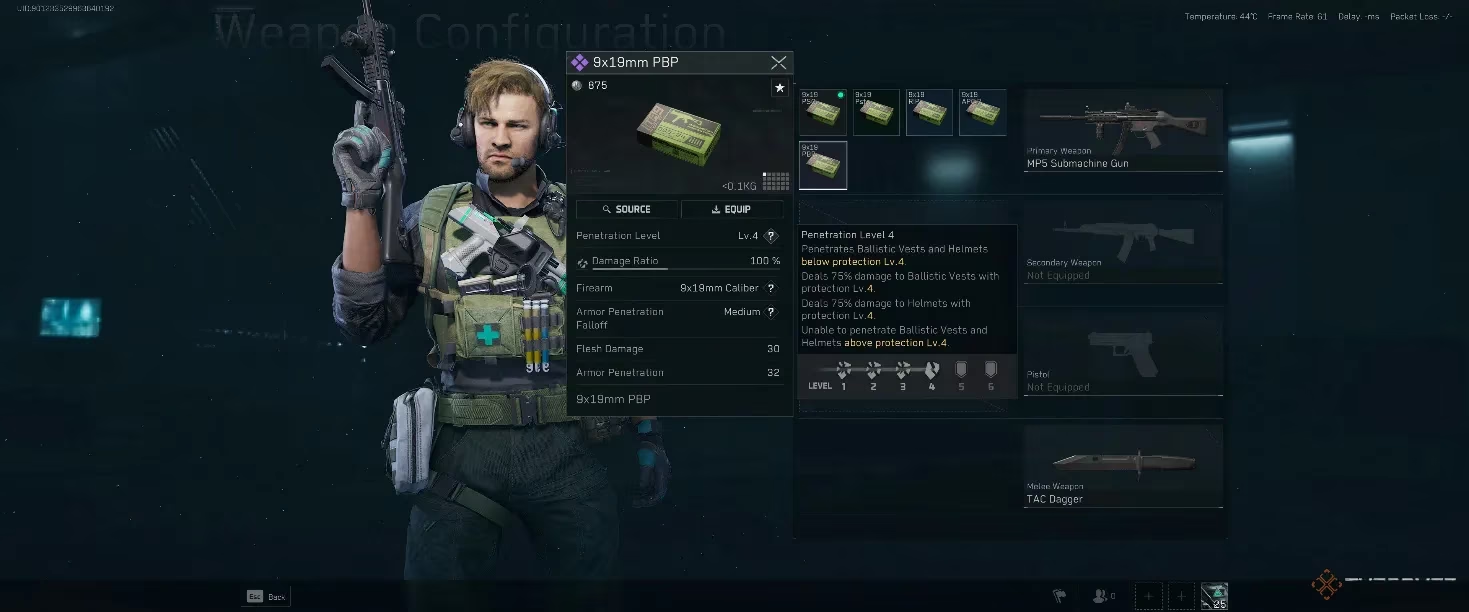
Ammo: The Great Equalizer (and Complicator): This is where things get beautifully complex. The golden rule? Use the best ammo you can afford, every single time. Whether it’s a sidearm or a primary, skimping on ammo is gambling with your Operator’s life. Ammo has levels mirroring armor (Levels 1-6, plus desperate Level 0 options). Higher level = better penetration. But the modifiers are where mastery lies:
-
Against Equal Level Armor: Your bullet only deals 75% of its base damage. It’s a significant reduction, forcing you to land more shots.
-
Armor Damage Multiplier: Ammo level dictates a hidden multiplier on top of its base damage against armor durability. Level 4 ammo shreds Level 5 armor at 100% efficiency but struggles at 60% against Level 6. Higher ammo levels have better multiplier curves.
-
The RIP Exception: 🩸 Ammo like 9mm RIP or .45 RIP plays by its own rules. Their penetration defies their level, focusing instead on massive flesh damage. They’re brutal against unprotected limbs (arms, legs) but bounce uselessly off high-level plates. Target selection is key!
Here’s the shocking truth I witnessed in a frantic warehouse fight: Any ammo can destroy any armor given enough volume of fire. I’ve seen a hail of Level 0 bullets from a chattering SMG turn expensive Level 4 armor into scrap metal in seconds. The armor did its job – absorbing all that damage instead of my health – but it was a fleeting, expensive shield. That moment burned two lessons into my brain:
-
ALWAYS pack Armor Repair Kits: 🔧 The rarer your armor, the higher-grade kit you need. Entering a fight with cracked or broken plates is suicide. Repairing mid-raid is a vital survival tactic.
-
Bring WAY More Ammo Than You Think: Running dry in a firefight is as fatal as having no armor. That empty click is the sound of defeat.
| Factor | Impact on Gameplay | My Personal Strategy |
|---|---|---|
| Ammo Level | Dictates penetration vs. armor levels; higher = better against plates | Never cheap out. Prioritize best affordable ammo for expected threats. |
| Armor Level | Determines protection threshold; higher = blocks lower level ammo completely | Balance protection & mobility. Level 4 often my sweet spot; Level 6 for known heavy zones. |
| Coverage | Only covered areas (chest, abdomen, shoulders) protected; limbs always vulnerable | Maximize core coverage. Skip shoulders if speed is critical. |
| Repair Kits | Essential for maintaining armor integrity during prolonged engagements | Never deploy without them. At least 2 kits, quality matching armor rarity. |
| Ammo Type | Special types (RIP) excel vs. flesh but fail vs. armor; know your target | Carry a mix. RIP for CQB/limb shots, high-pen for geared opponents. |
Surviving Delta Force isn't just about sharp aim; it's about understanding the brutal calculus of ballistics and protection. Respect the armor levels, invest in good ammo, repair constantly, and never forget: your legs are always a liability. See you in the hot zone, Operator. Stay sharp, stay covered, and always bring extra bullets. 💥
Leave a Comment